Spamihilator Documentation « Mail Client Configuration
Mail Client Configuration
Your mail client software (e.g. Microsoft® Outlook, Outlook Express, Thunderbird or Eudora) needs to be configured to enable filtering by Spamihilator.
Mail Client Configuration with the Setup Wizard
Use the setup wizard to configure your mail client. The wizard will be launched after the installation of Spamihilator.
You can use the setup wizard later by clicking on Spamihilator/Setup Wizard in your start menu.
Manual configuration
-
Open your mail client and then open the account settings from its menu.
-
Enter your username in the following format:
pop3server&username[&port]If you have an IMAP server you may enter your username in almost the same way:
imapserver&username[&port]The port is optional.
Examples:
pop.gmx.net&anyuser@gmx.net&110 pop3.web.de&freemailuser mail.anyserver.com&anyuser imap.theserver.com&myself&143 imap.anotherserver.com&someoneelse -
Enter localhost (or 127.0.0.1 alternatively) as POP3/IMAP server.
-
Save your settings by clicking on OK.
Significant Note
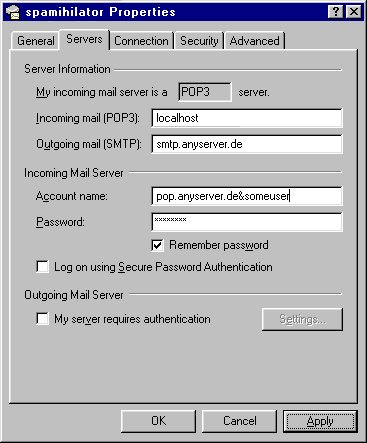
It is very important to use separate server entries for mail reception and for mail sending.
The server entries for the mail reception have to be modified for Spamihilator, so he can interconnect the mail client with the mail server.
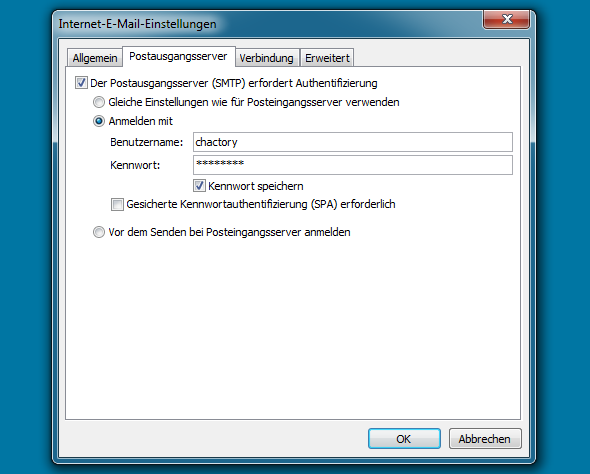
However, the mail sending entries have to keep the preexisting informations. The reason is, that Spamihilator only operates with the mail reception, and never is involved in sending mail.
Some mail clients tend to change both entries together, which can cause some confusion in mail handling.
Examples
This is an example from Microsoft® Outlook Express:
Now an example from the mail account configuration in Microsoft® Outlook 2010:
 Zur deutschen Seite wechseln ...